Content stages
Hygraph has two stages, DRAFT and PUBLISHED. DRAFT allows people to add and edit content without affecting published content. When the content is ready to be pushed live, it is added to the PUBLISHED stage.
Content staging allows users to compare versions of content in different stages. When editors want to quickly revert changes to the DRAFT stage from the PUBLISHED stage, content editors can compare the two content stages and choose which fields to revert to the PUBLISHED. It saves content teams time and energy by ensuring teams must not do double the work when trying to rollback changes.
This feature can be particularly helpful when using Custom Roles to create more sophisticated workflows for the team. For example, if a team member should only be able to create DRAFT content but not move it directly to the PUBLISHED stage, this is possible with Custom Roles.
Content stages are environment specific. This means their configuration is applied per environment. Take this into consideration if you're working with a project using more than one environment.
Creating custom content stagesAnchor
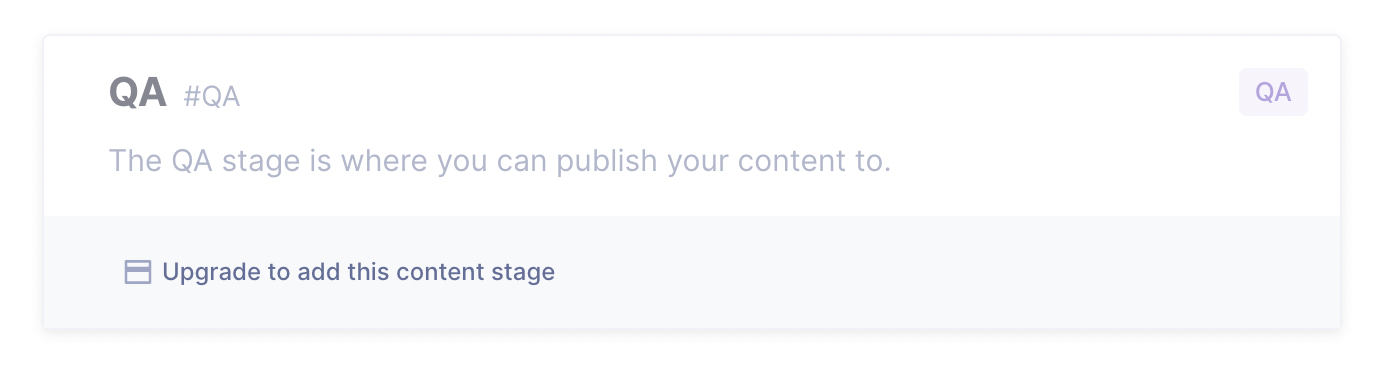
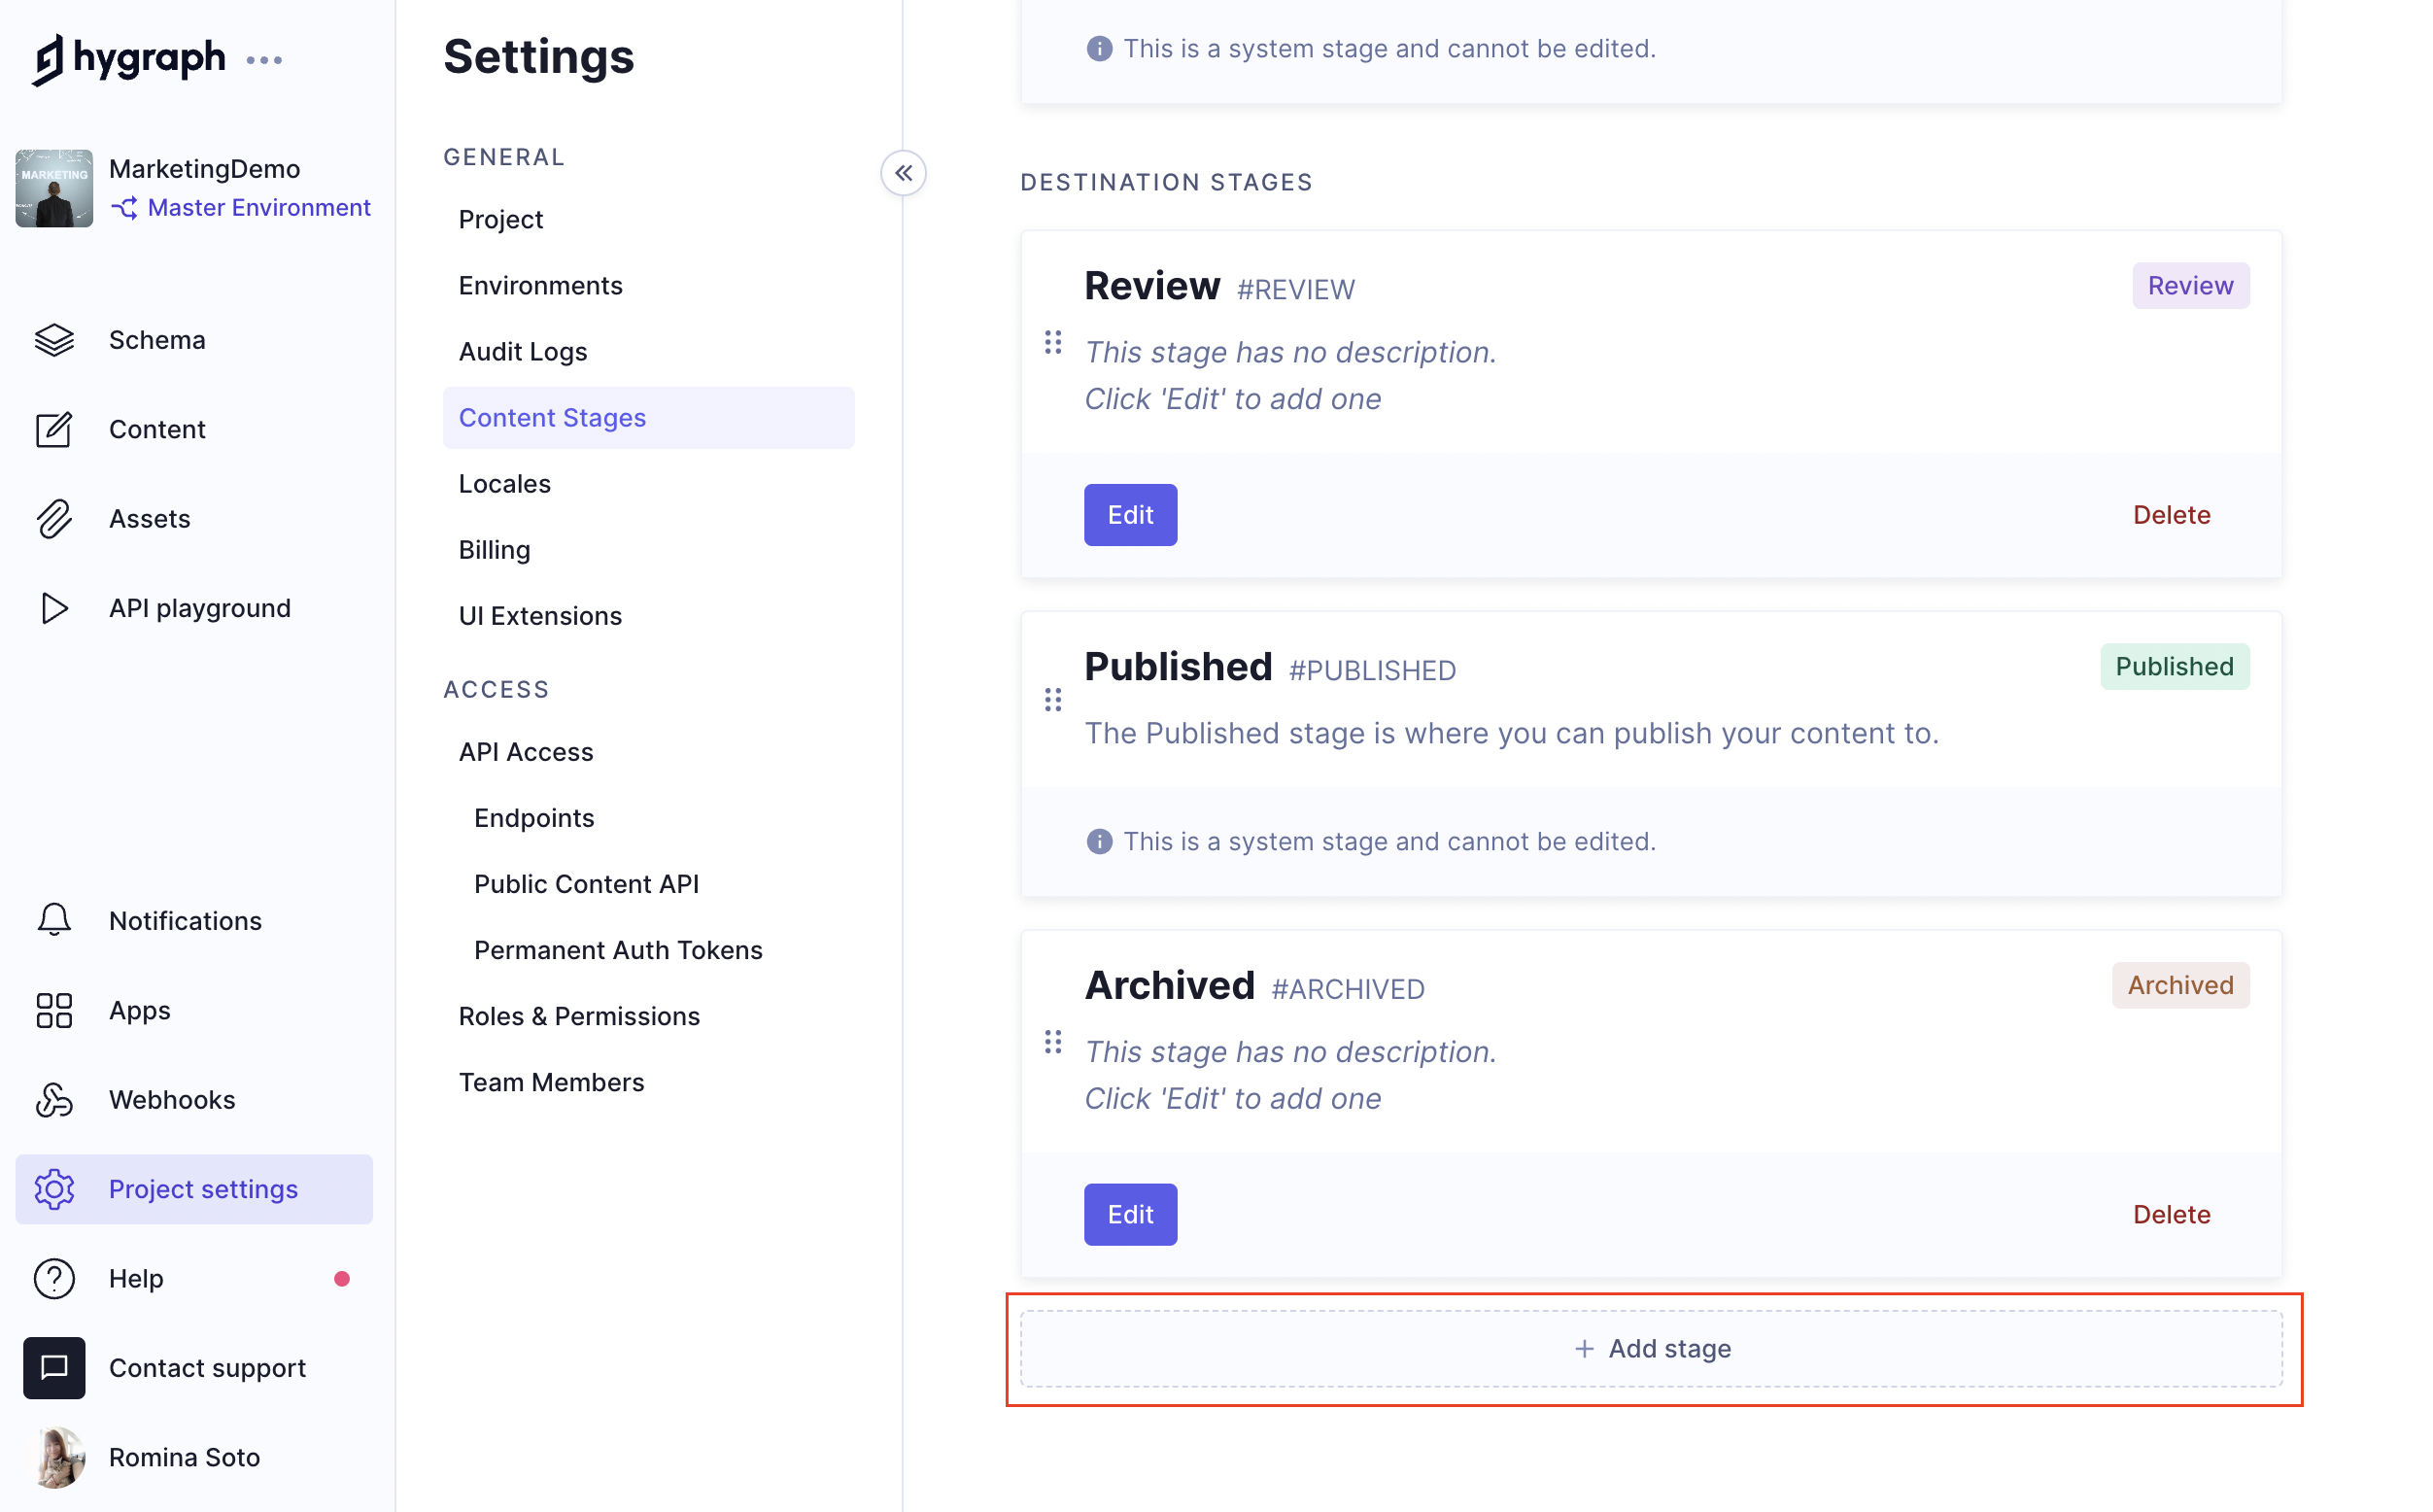
You can create your own content stages from within your project settings. The default screen shows the DRAFT and PUBLISHED stages, and offers the option to upgrade your plan if you want to configure any additional stages.

The QA stage card is grayed out as it's not part of the Community Plan. Clicking on the Upgrade to add this content stage link at the bottom of this card displays a popup where you can select the best plan for your project.
You can also change the order of your destination content stages by clicking on the six dots icon - located to the left of each configured stage card - and dragging.
If you haven't reached the limit of stages for your plan, then you will simply be provided with the option of adding a new stage.
Clicking on + Add stage displays a screen where you will be required to provide a Display name, select a label color and, optionally, add a description. The API ID field will be autocompleted as you write the display name.
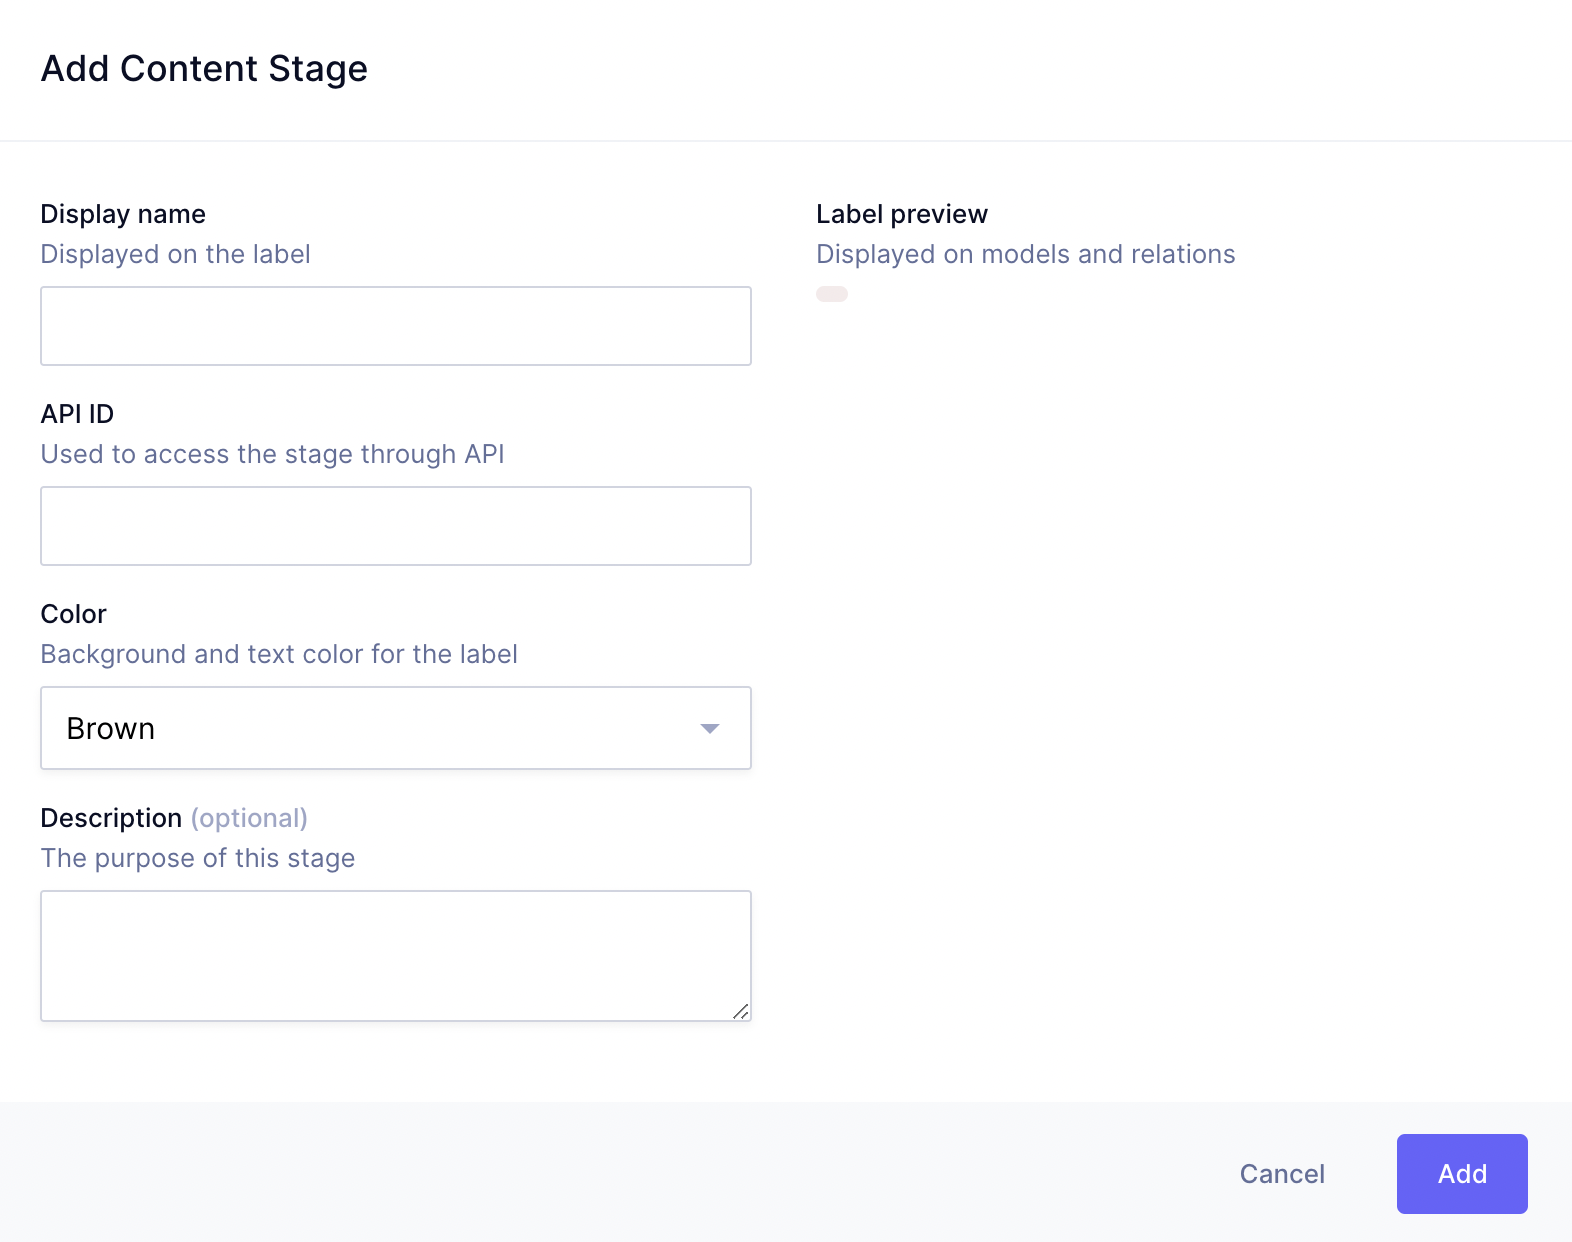
Finally, click on the Add button to create the content stage.
